Mastering Data Extraction: From Form Design to Final Data

A comprehensive guide to RevPro’s powerful data extraction module. Learn how to design custom forms, assign studies, extract data, and ensure quality control.
Unlock the Power of Structured Data Extraction
Data extraction is the backbone of any systematic review. The quality of your extracted data directly impacts the validity of your conclusions. RevPro’s Data Extraction module is designed to make this critical process efficient, collaborative, and highly accurate. This guide covers the entire workflow, from designing your extraction forms to managing the final dataset.
Part 1: Designing Your Data Extraction Forms
Before you can extract data, you need to create a structured form, or "template." This ensures that every reviewer collects the exact same information in a consistent format.
Creating a New Form
To get started, navigate to your project, go to the "Data Extraction" tab, and click on "Manage Forms." Here, you have two options for creating a new form:
- Use a Pre-defined Template: RevPro comes with standard templates (e.g., for study characteristics, outcomes) to give you a head start. Simply select a template and customize it.
- Create a Custom Form: Build a form from scratch using our intuitive form builder. Add fields, define their types, and arrange them in the perfect order for your review.

Managing and Editing Forms
On the "Manage Forms" page, you can see all forms created for the project. From here, you can:
- View: Preview the structure of any form.
- Edit: Modify a form by adding, removing, or reordering fields.
- Delete: Remove a form that is no longer needed (note: this may not be possible if data has already been extracted using it).
Part 2: Conducting the Data Extraction
With your forms designed, it’s time to start extracting data from the studies that passed full-text screening.
Step 1: Assigning Studies for Extraction
A project manager must first assign studies to reviewers. From the "Studies" list, select a study and click "Assign for Extraction." You will then be able to:
- Choose the Extraction Form: Select the appropriate form you designed in Part 1.
- Select Reviewers: Assign the study to one or more reviewers for extraction. Assigning to multiple reviewers enables dual data extraction for quality control.
Step 2: The Extraction Interface
As a reviewer, you will see your assigned extraction tasks on your dashboard. Clicking on a task will open the extraction interface, which displays the study details (like the PDF) alongside the extraction form. Simply fill in the fields as you review the study.
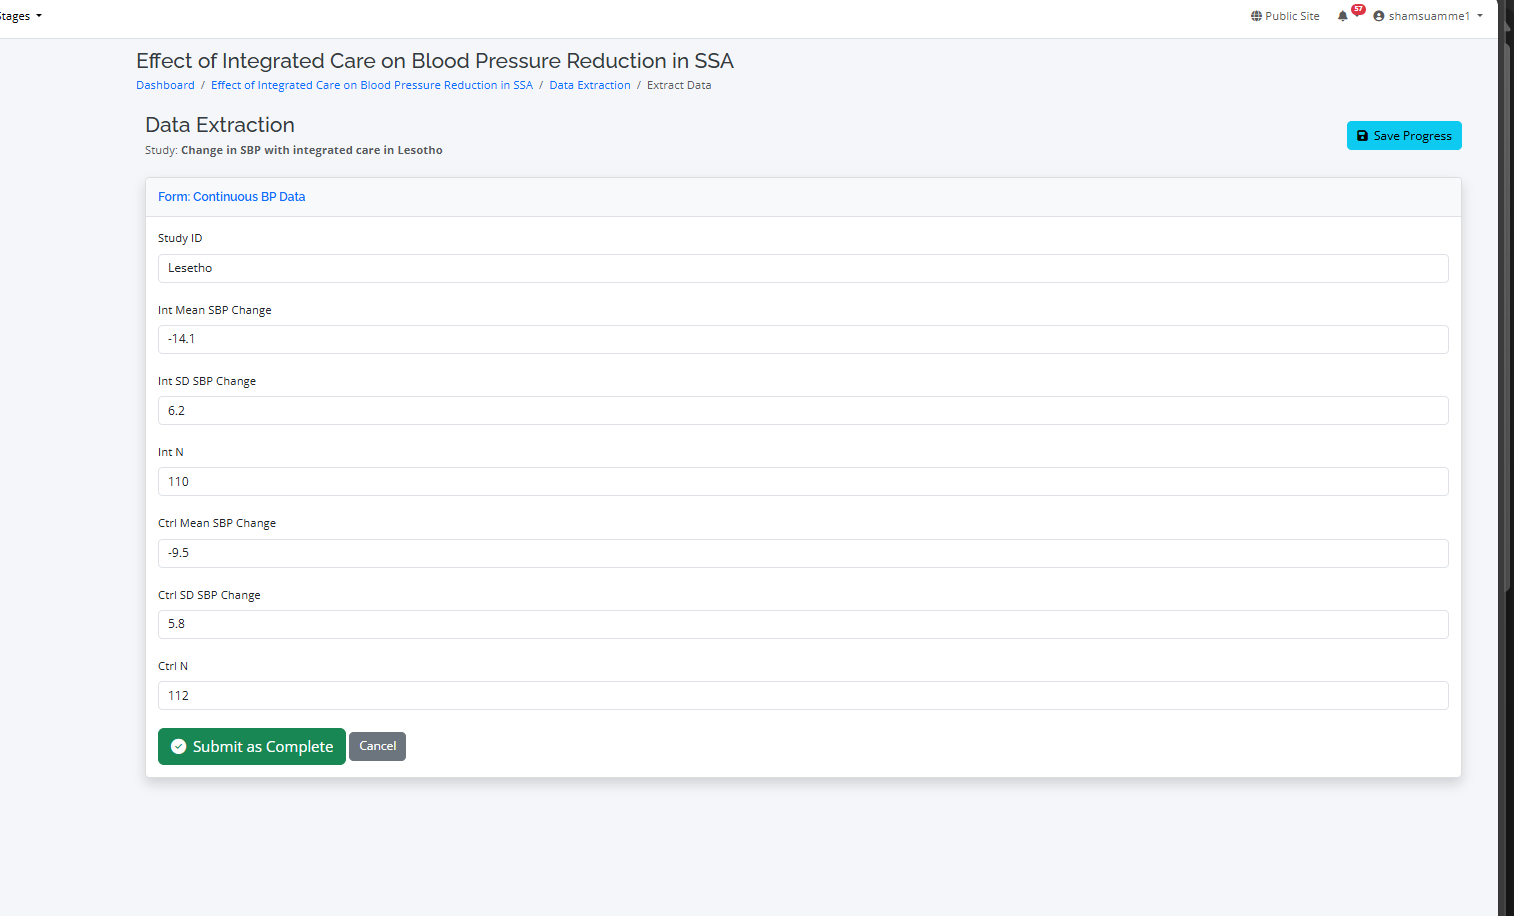
Your progress is saved automatically as you work. Once you have filled all the fields, click "Complete Extraction" to submit your work.
Part 3: Quality Control & Conflict Resolution
Ensuring the accuracy of extracted data is crucial. RevPro has built-in tools to help.
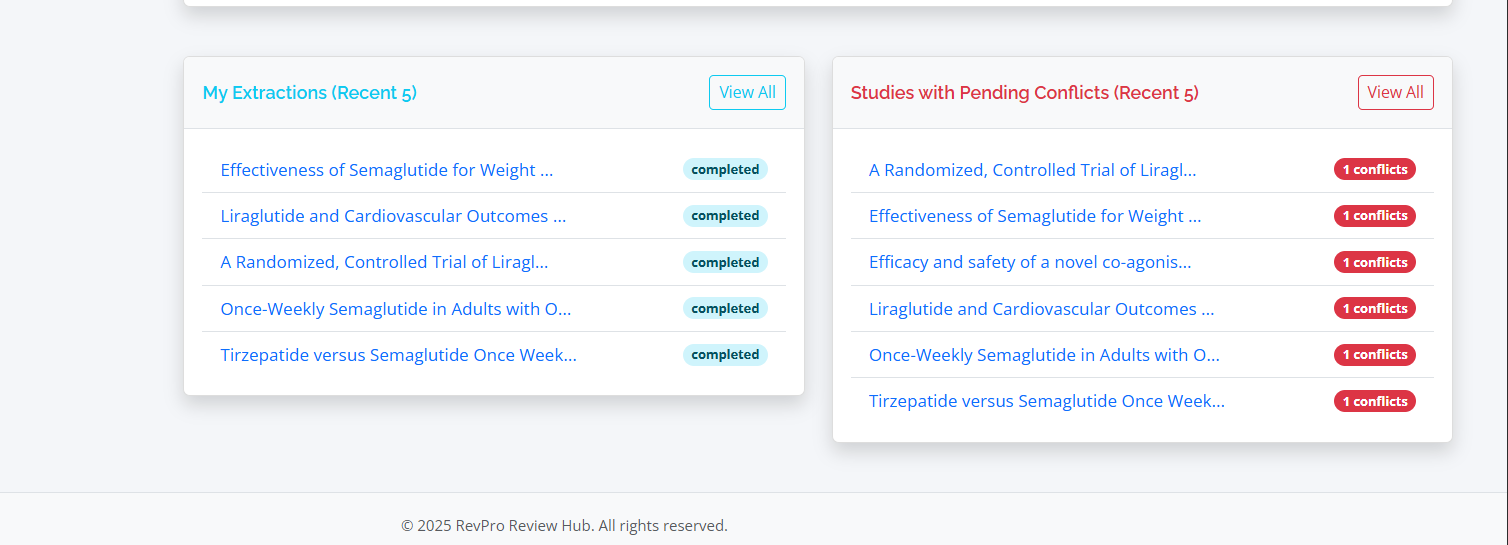
Handling Discrepancies
If a study was assigned to two or more reviewers, RevPro will automatically compare their extracted data. If any discrepancies are found, the task is flagged for conflict resolution.

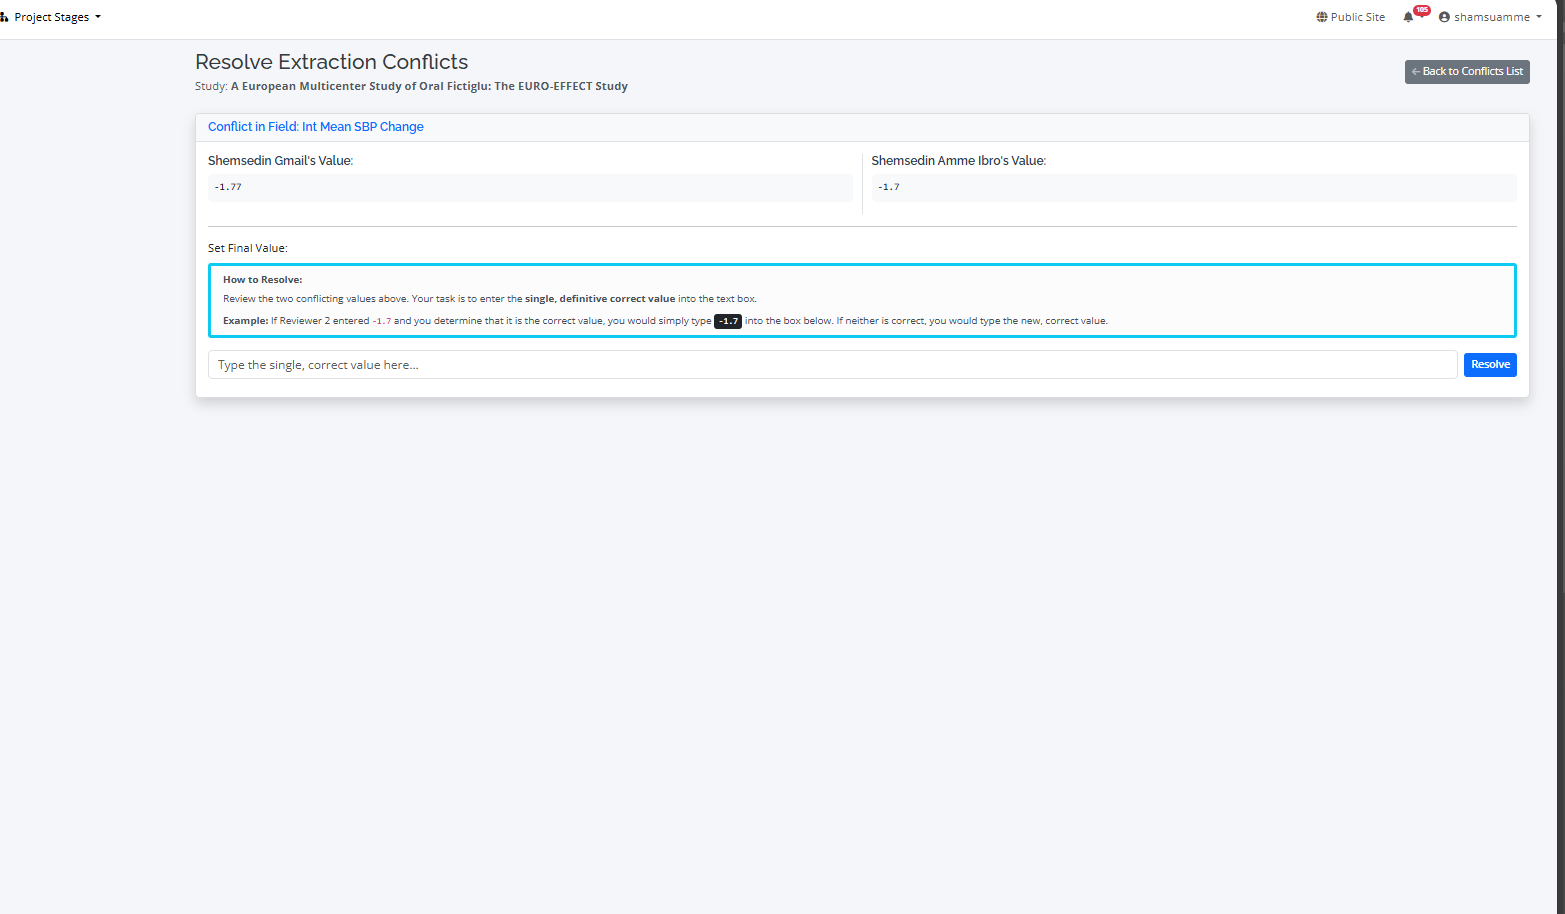
- Conflict View: A dedicated screen shows the differing values side-by-side for each conflicting field.
- Resolution: A third, senior reviewer can then review the discrepancies and select the correct value, creating a single, reconciled dataset.
- Inter-Rater Reliability (IRR): For advanced quality control, you can calculate statistics like Cohen's Kappa to measure the level of agreement between your reviewers.
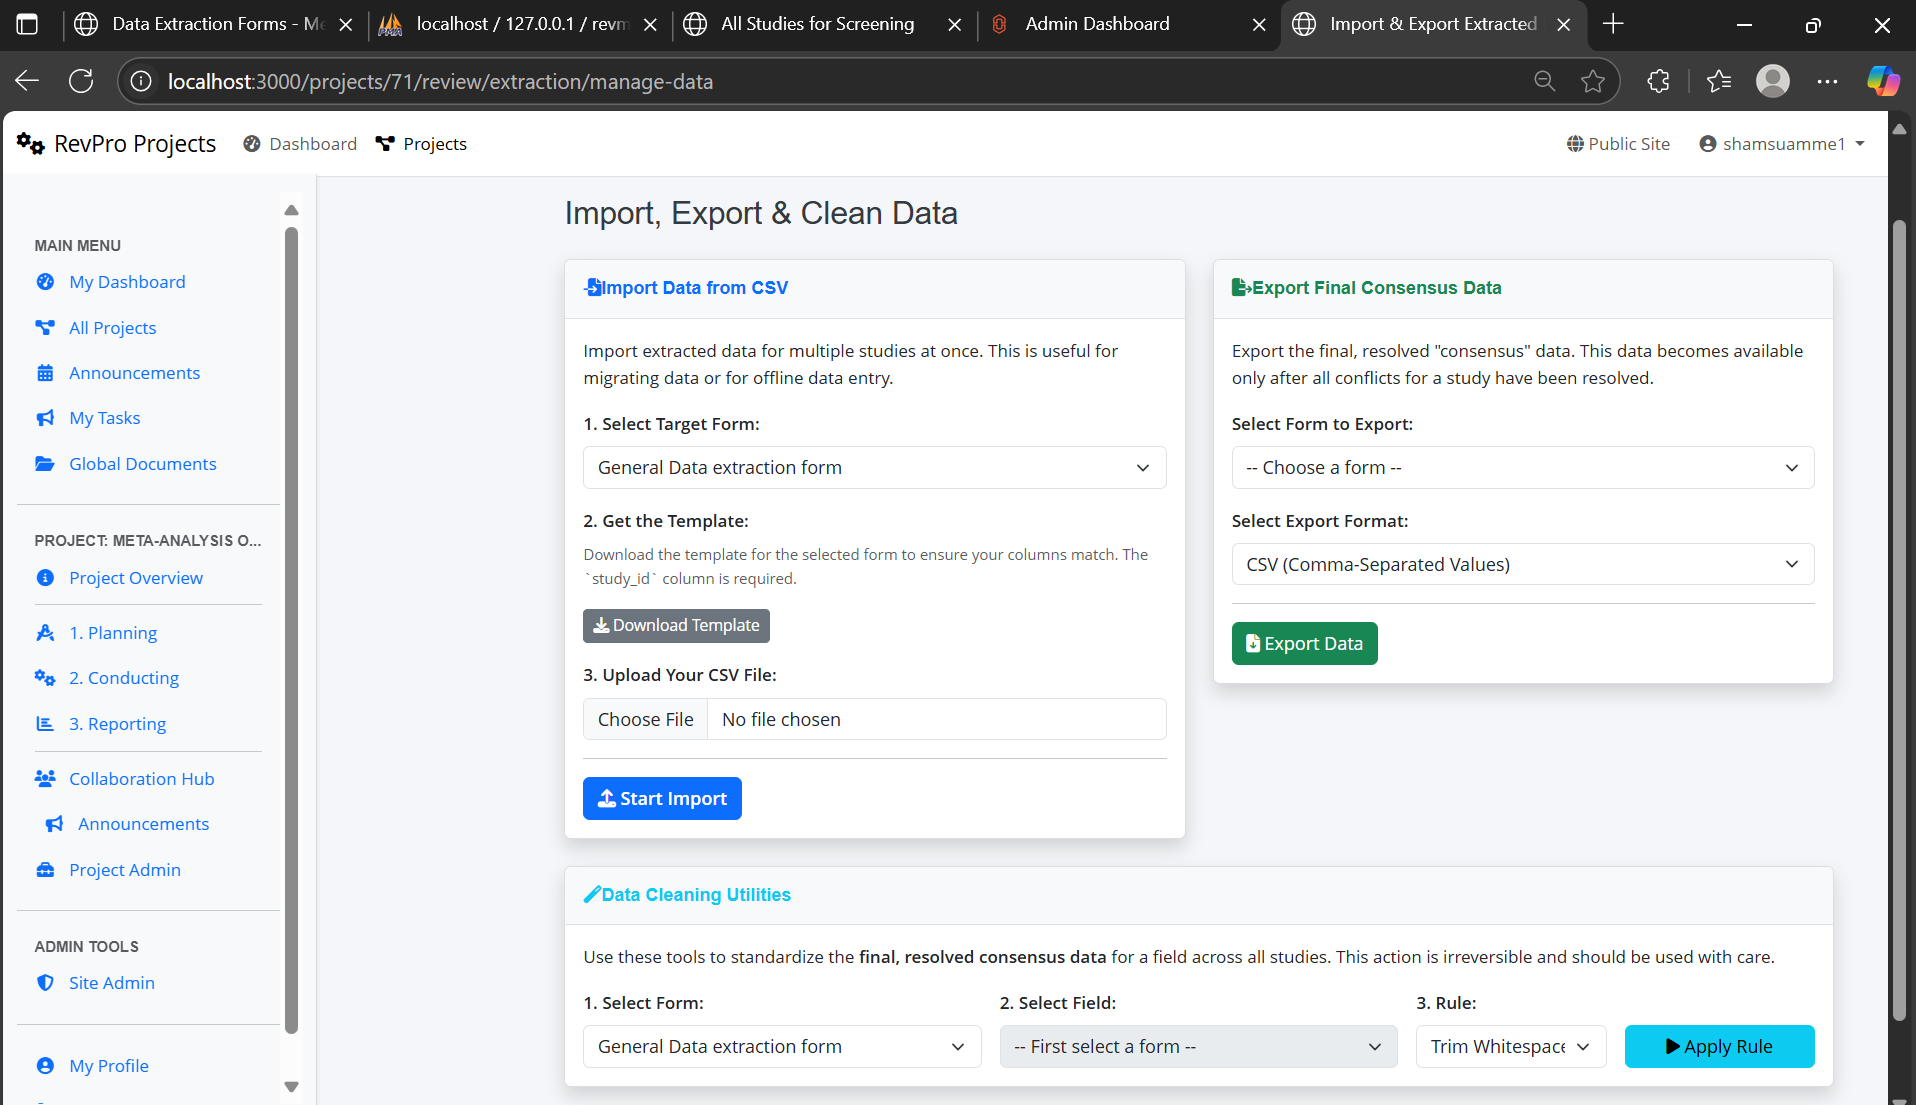
Part 4: Managing Your Final Dataset
Once extraction is complete and all conflicts are resolved, RevPro gives you full control over your data.
- Export Data: Export the complete, reconciled dataset as a CSV file, ready for statistical analysis in software like R, Stata, or SPSS.
- Import Data: If you have data from a previous review, you can import it into RevPro using a structured CSV file.
- Data Cleaning: Use built-in tools to perform basic data cleaning, such as standardizing date formats across all entries.