Search Management Module - User Guide
 by Shemsedin Amme
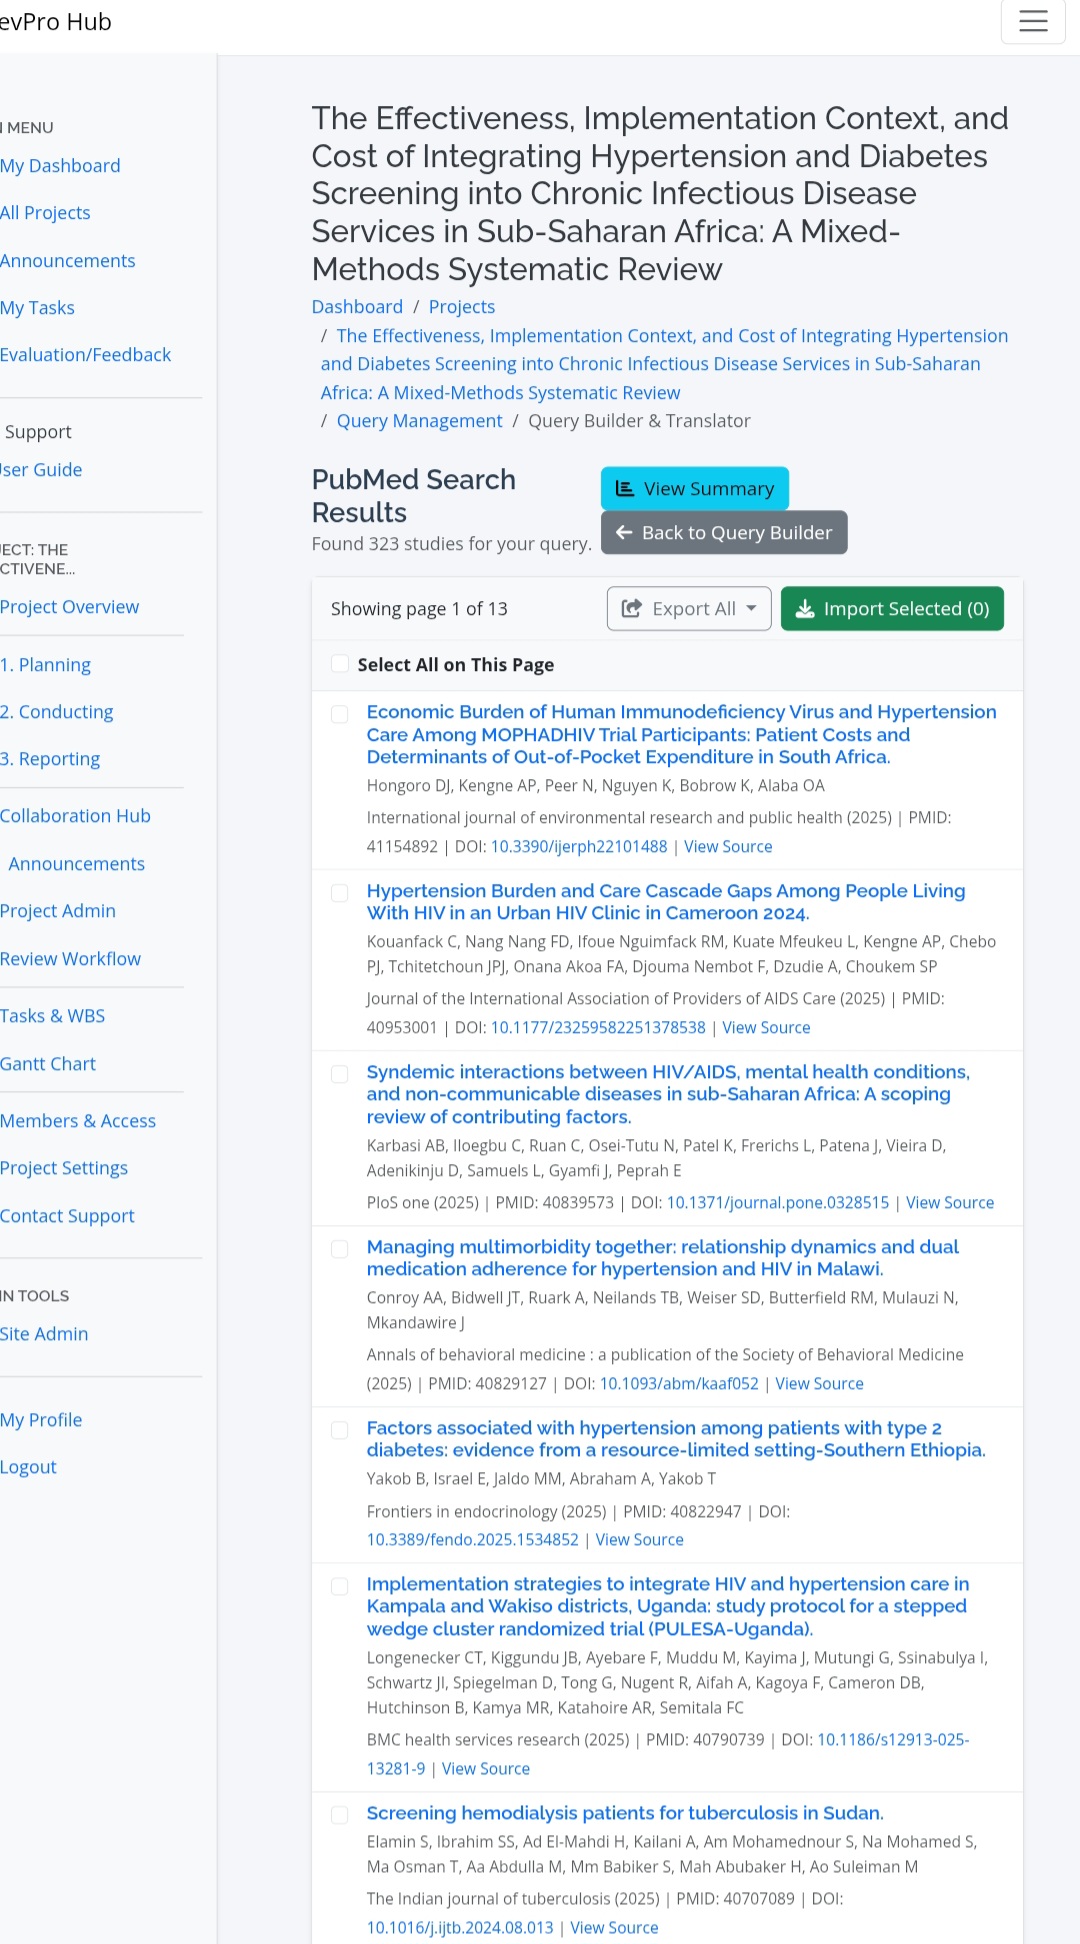
The Search Module is a powerful suite of tools integrated into ReviProHub. It is designed to help you construct complex search queries, translate them for various academic databases, execute searches, and analyze the results, ensuring your search strategies are comprehensive, accurate, and reproducible
The Search Module is a powerful suite of tools integrated into ReviProHub. It is designed to help you construct complex search queries, translate them for various academic databases, execute searches, and analyze the results, ensuring your search strategies are comprehensive, accurate, and reproducible.
Workflow Overview
The module follows a logical three-step process:
- Build or Load a Master Query: Use the Query Builder to construct a search string in a standard format (PubMed short form).
- Translate the Master Query: Use either the AI-Powered or Rule-Based translator to adapt your query for different databases.
- Execute Search & Analyze Results: Run your translated query against supported databases (like PubMed and LENS.org), import studies, and review summary analytics.
Part 1: The Query Builder
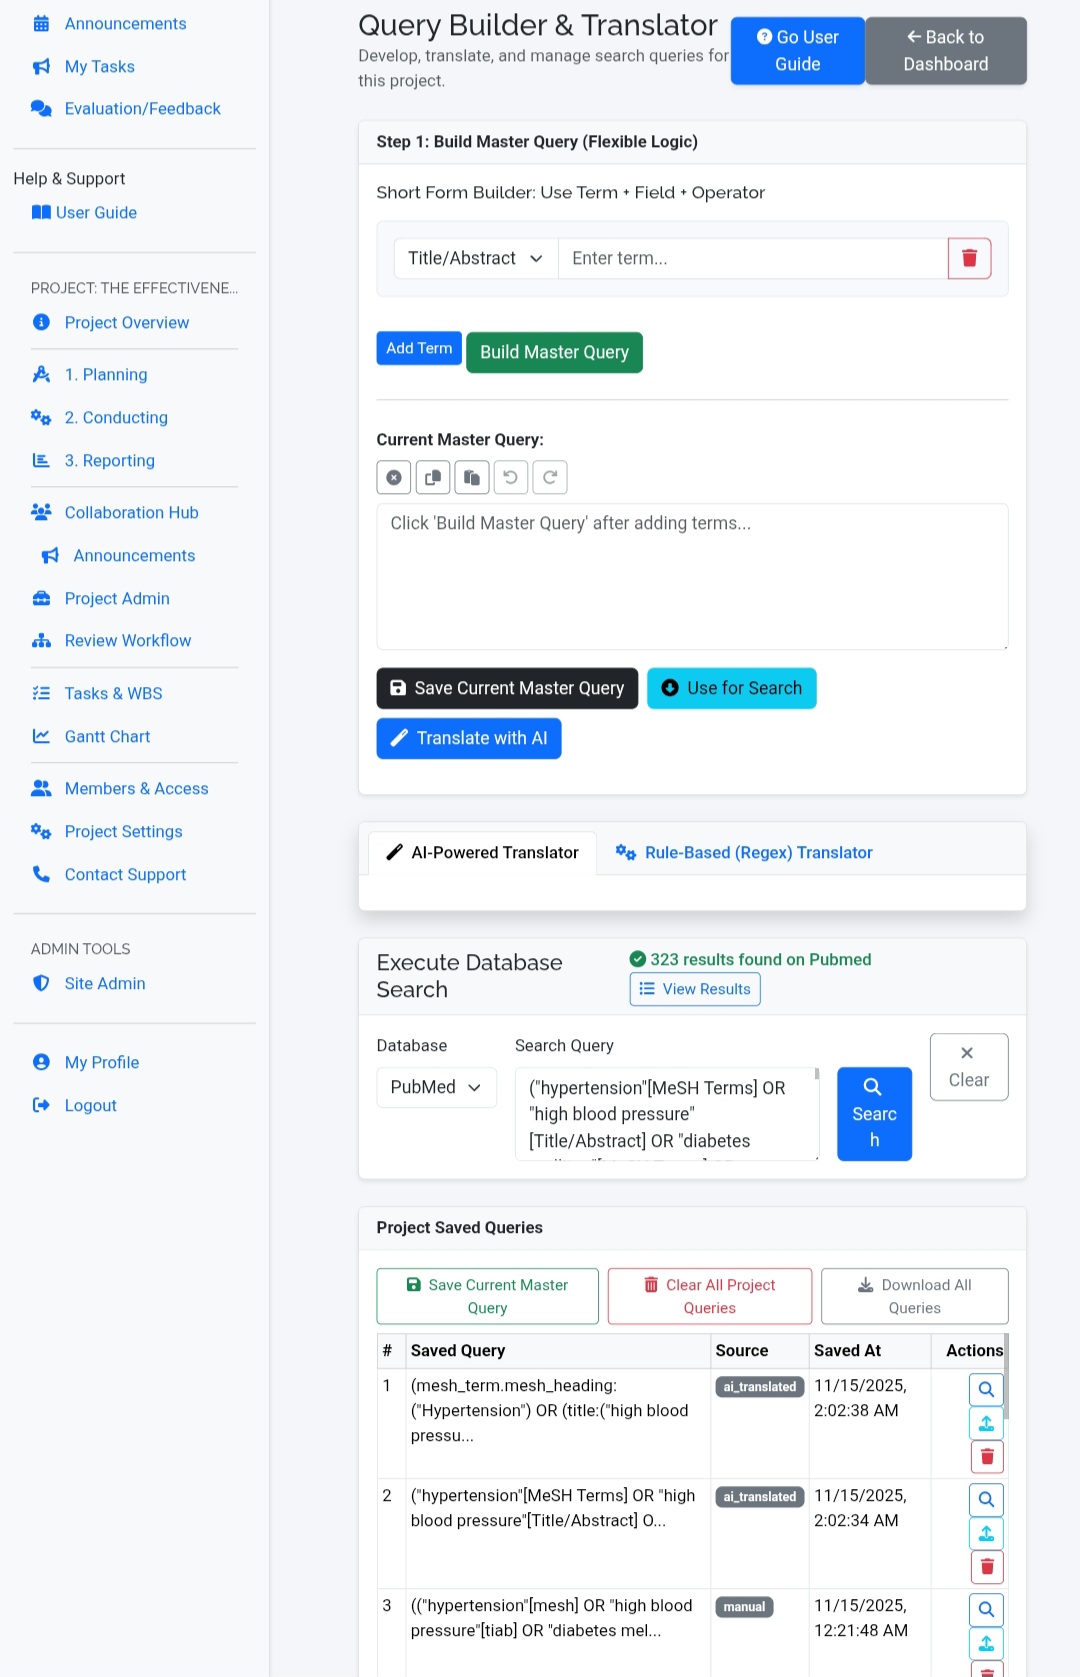
This is your starting point. The goal is to create a single, editable "Master Query" that represents your complete search logic.
Using the Short Form Builder
This is the most flexible method for building queries term-by-term.
- Add Term: Click to add a new row. For each row, enter a search term and select its field tag (e.g., `Title/Abstract`, `MeSH Term`).
- Combine Terms: For the second term and beyond, a boolean operator (AND, OR, NOT) will appear, allowing you to build complex logic.
- Build Master Query: Click this button to combine all rows into a single string in the "Current Master Query" text area below.
Managing the Master Query
The "Current Master Query" text area is the central hub. You can directly type or paste queries into it at any time.
- Control Buttons: Use the small buttons above the text area to Clear, Copy, Paste, Undo, or Redo your changes.
- Save Query: Click to save the current string to your project's query history for later use.
- Use for Search: Click to quickly copy the query down to the "Execute Database Search" section.
Part 2: Translating Your Query
Once your Master Query is ready, you can translate it using one of two powerful methods, accessible via tabs.
AI-Powered Translator
This is the recommended method for the highest accuracy and methodological soundness.
- Click the button in the Query Builder section.
- The AI will automatically detect the syntax of your master query.
- It then translates the query into the correct format for all supported databases, intelligently handling complex rules, exceptions (like capitalization on LENS.org), and methodologically appropriate field mappings (like for Web of Science).
- Each translated query appears in its own card with highlighted terms and action buttons.
Rule-Based (Regex) Translator
This method uses a predefined set of rules for translation. It is fast and reliable for standard queries.
- Select the "Rule-Based (Regex) Translator" tab.
- Check the boxes for the databases you want to translate your query for.
- Click the button.
- The translated queries will appear below in individual cards.
Working with Translated Queries
Whether using the AI or Rule-Based method, each resulting card provides the same powerful controls:
- Copy: Copies the translated query to your clipboard.
- Download: Downloads the query as a `.txt` file.
- Save: Saves this specific translated query to your project's query history, automatically tagging it with the correct database name.
Part 3: Executing Searches and Handling Results
After building and translating your query, you can run it directly against supported databases.
Executing a Database Search
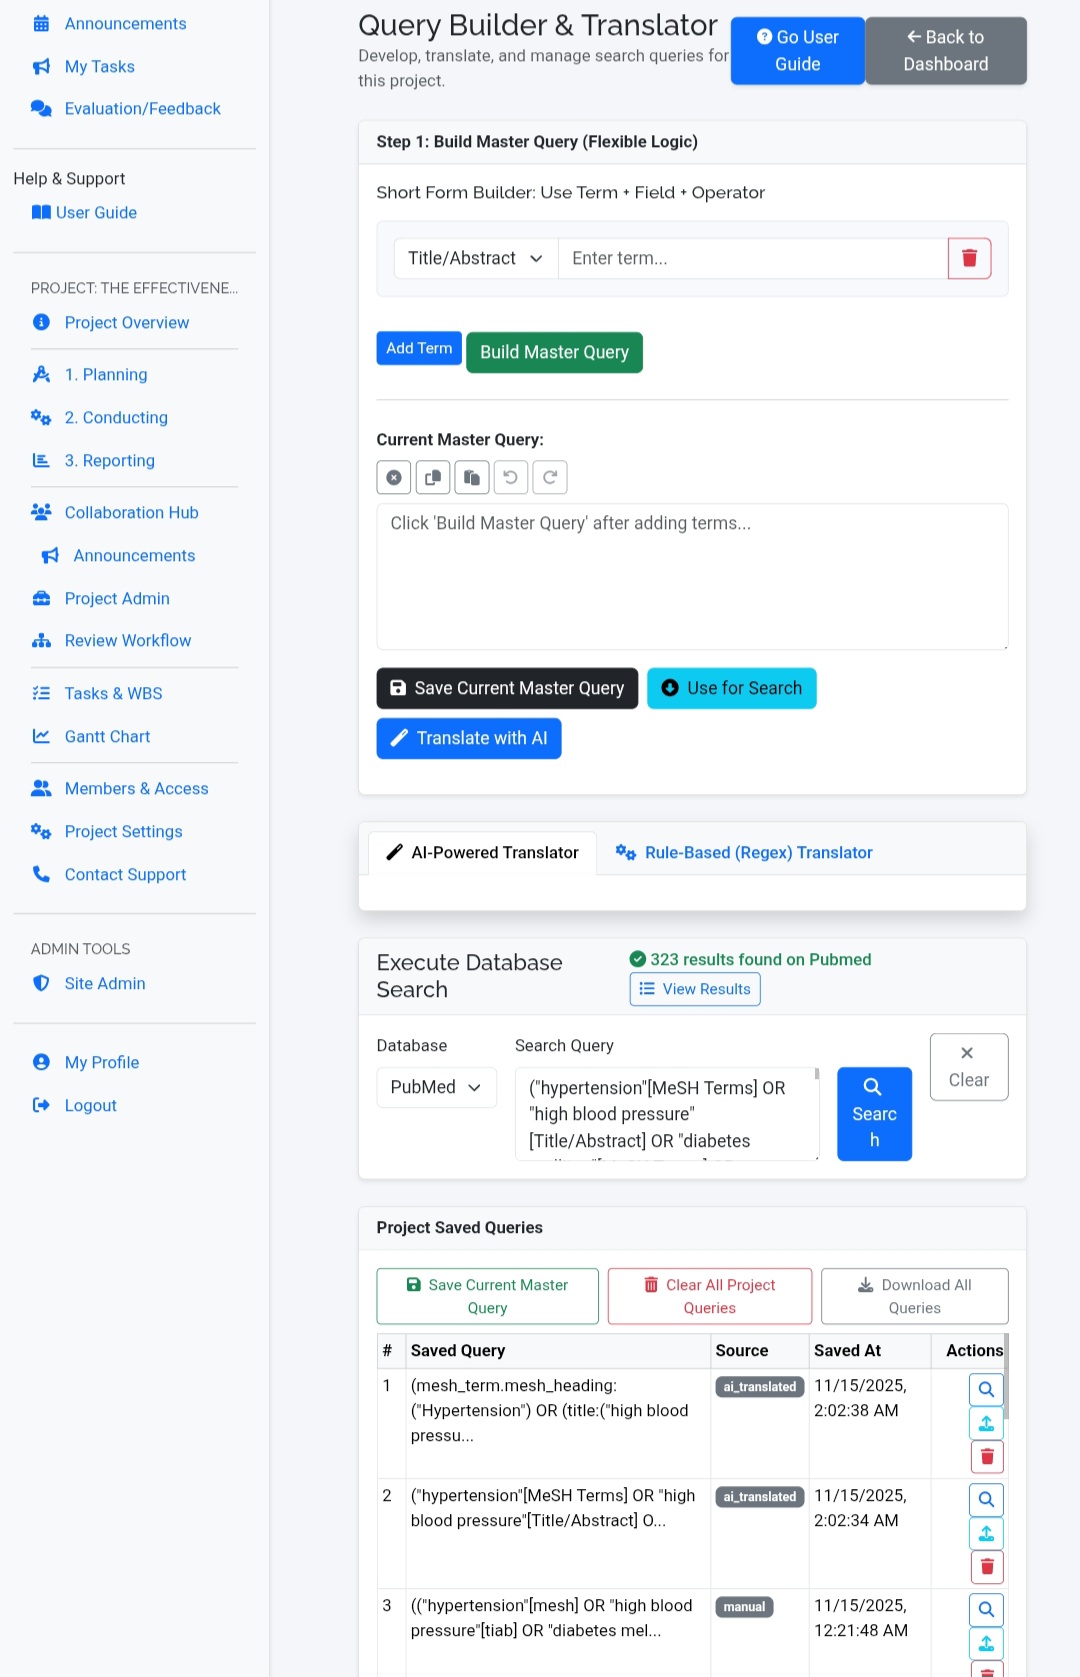
- Navigate to the "Execute Database Search" section.
- Select your target Database (e.g., PubMed, LENS.org).
- Paste your correctly translated Search Query into the text area. (You can use the "Use for Search" or "Copy" buttons from above for this).
- Click .
Viewing and Importing Search Results
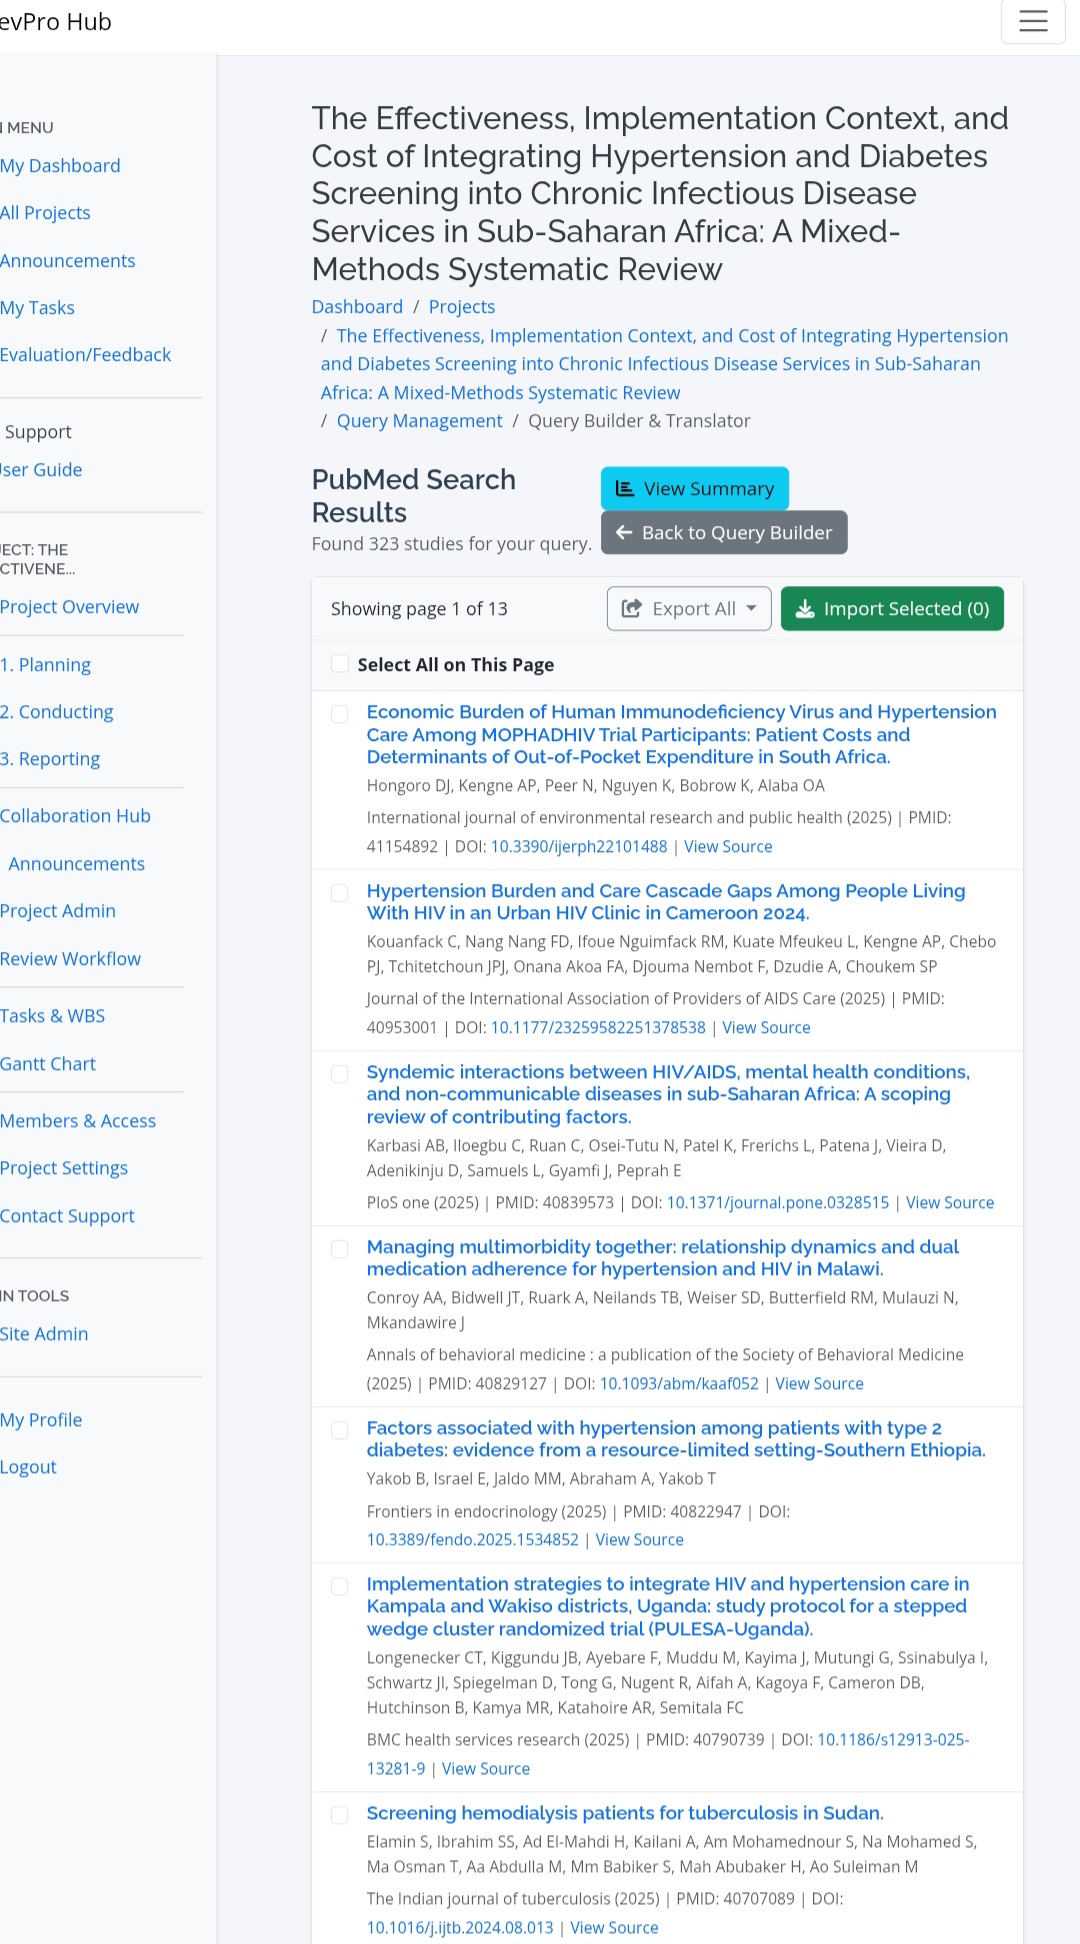
After a successful search, a results list will appear.
- Review Results: The page displays a paginated list of studies found, showing title, authors, and journal information.
- Select Studies: Use the checkboxes to select the studies you wish to import into your ReviProHub project for screening.
- Import: Click the button to add the chosen studies to your project's library.
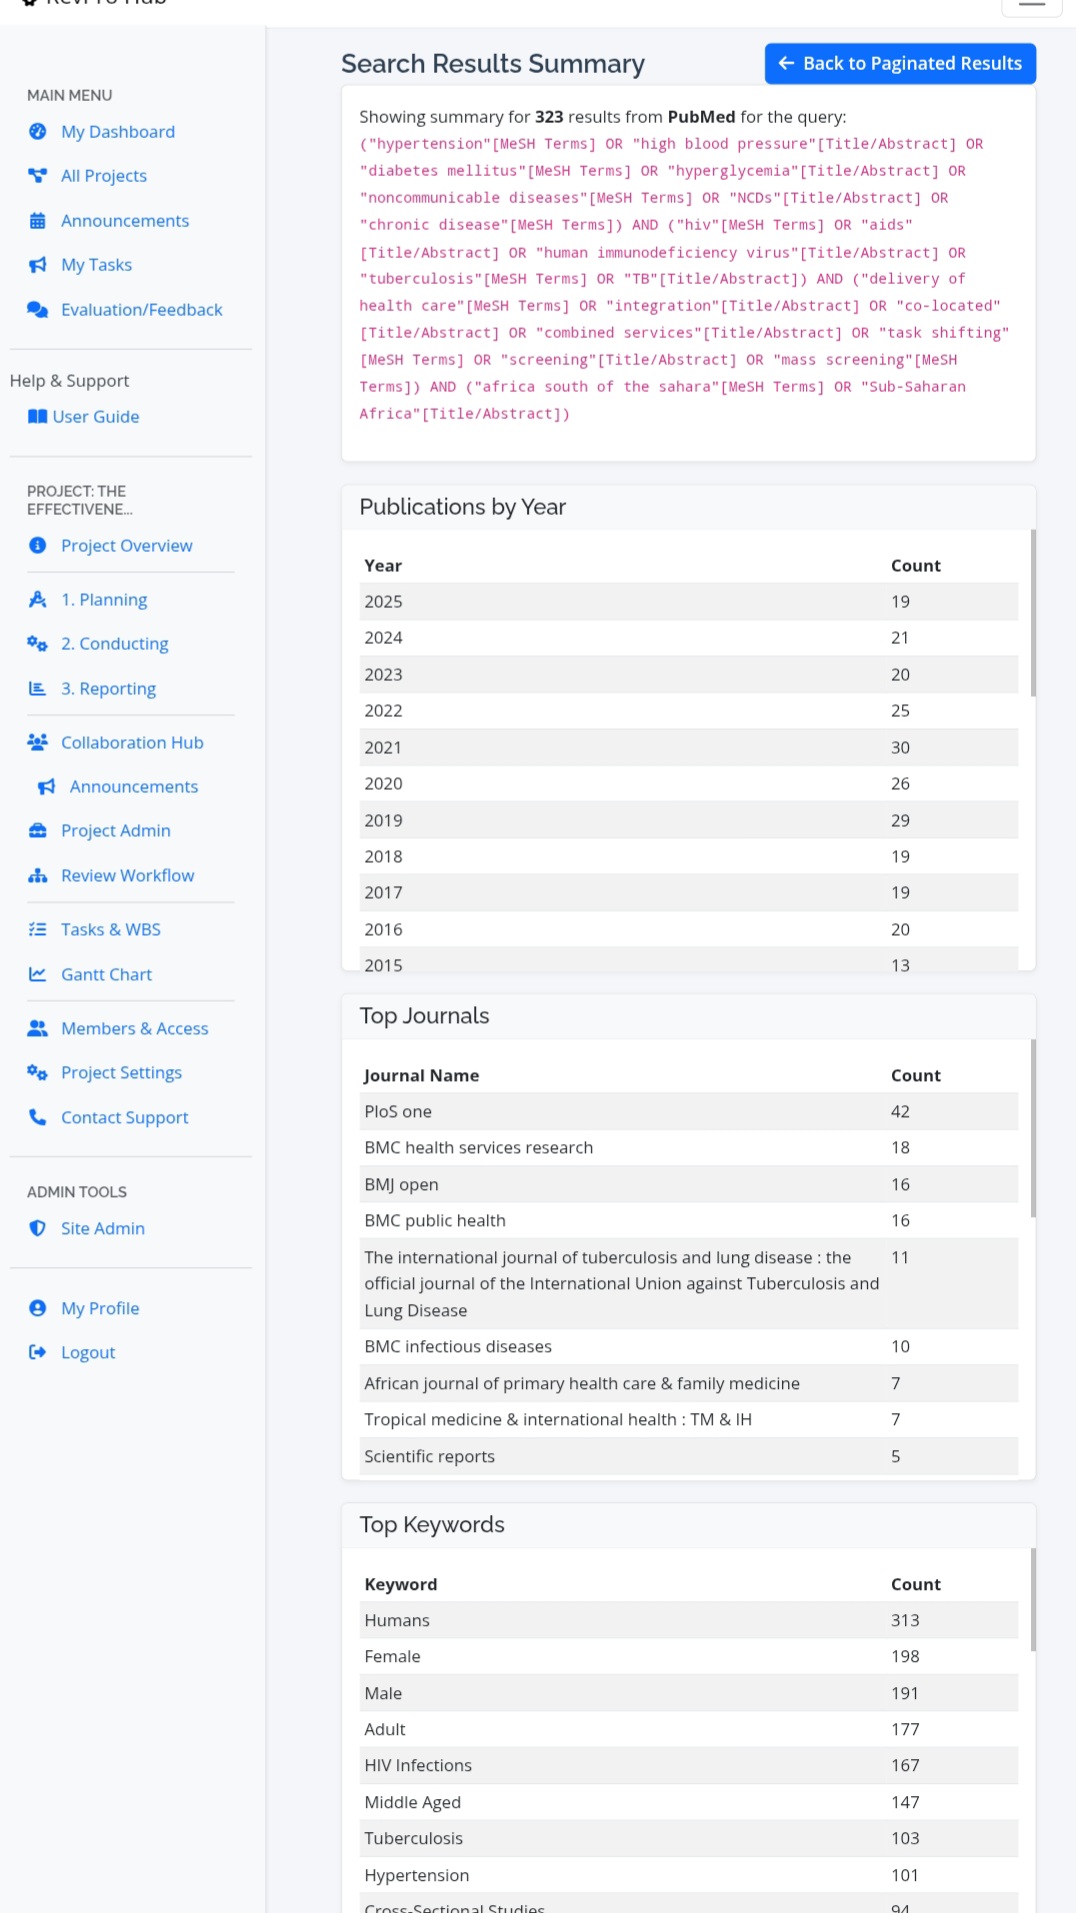
Search Results Summary
For large result sets, the Search Results Summary page provides powerful analytics to help you understand the landscape of the literature and refine your query.
- Access: After a search, a "View Results Summary" link will appear.
- Analytics: The summary page displays charts and tables for:
- Publications by Year
- Top Journals
- Top Keywords
- Publication Types
- Top Countries of Publication
Part 4: History & Query Management
The "Project Saved Queries" table at the bottom of the page lists all master queries and translated queries you have saved.
- Load a Query: Click the "Load" button () to place a saved query back into the Master Query box for editing or re-translation.
- Delete a Query: Click the "Delete" button () to permanently remove a query. This action cannot be undone.